Colt McAnlis · May 3, 2016 · 10 min read
If you’re a modern developer, then you use JPG files. Doesn’t matter if you’re a web dev, mobile dev, or some weird sysadmin who just sends around memes all day. JPGs are a part of your job, and critical to the experience of the uses who benefit from that work.
Which is why it’s so important to make sure these JPG files are as small as possible. With the Average webpage size now larger than the original DOOM game, you have to start asking where all the bytes are coming from, and how you can do more to toss those things out(Don’t get me started on the sizes of mobiles apps…).
While JPG in its’ own right, how you use it in your application can influence the size of these files significantly. As such I’ve assembled a handy collection of things that can help you squeeze out those last bits, and make a better experience for your users.
You should be using an optimizer tool
Once you start looking at JPG compression methods, and the file format, you’ll start to realize that, much like PNG files, there’s plenty of room for improvement. For example, check out the file size difference when you save a JPG from photoshop, vs “exporting for web”:

That’s around a 90% file size reduction, for a simple red square. See, much like PNG, JPG also supports some chunk data in the file format, which means photo editors or cameras can insert non picture information into the file. This is why your photo sharing service knows the geolocation of the last waffle you ate, and what camera you took it with. If your application doesn’t need this extra data, then removing if from the JPG files can yield a significant improvement.
But it turns out there’s quite a bit more you can do with the format.
For starters, tools like JPEGMini are geared towards finding lower quality(lossy) compression w/o disrupting the visual fidelity of your images too much. Which is similar to what the Mozilla folks have done with MOZJpeg(Although they explicitly state that their project does break some compatibility).
On the other hand, jpegTran/cjpeg attempt to provide lossless improvements to size, while packJPG will repack JPG data into a much smaller form, although it’s a separate file format, and not JPG compatible any more(which is handy if you can do your own decode in the client).
In addition to those, there’s a whole slew of web-based tools, but I haven’t found those to be any better than the ones listed(or rather, most of them just use the above tools behind the scenes…). And of course, ImageMagick has it’s own bag of tricks.
The end result is adopting these tools can often net you 15% and 24% reduction on file sizes, which is a nice improment for a small investment.
[UPDATE 3/26/2017] Google just released a new JPG compressor, Guetzli, which can reduce files by an extra ~35% while still keeping the format compatible with standards. Guetzli works much like it’s cousin, Zopfli, in that this size reduction comes at the cost of extra processing time during encoding.
Find the optimal quality value.
Let’s be clear about this: you should never ship JPGs @ 100 quality.
The power of JPG comes from the fact that you can tune the quality vs file-size ratio with a scalar value. The trick, is finding out what the correct quality value is for your images. Given a random images, how do you determine the ideal setting?
As the imgmin project points out, there’s generally only a small change in user-perceived quality for JPG compression between levels 75 and 100:
For an average JPEG there is a very minor, mostly insignificant change in apparent quality form 100-75, but a significant filesize difference for each step down. This means that many images look good to the casual viewer at quality 75, but are half as large than they would be at quality 95 As quality drops below 75 there are larger apparent visual changes and reduced saving in filesize.
So, starting at a quality setting of 75 is an obvious initial state; but we’re missing a bigger problem here: We can’t expect people to fine-tune this value by hand.
For large media application that upload and re-send millions of JPGs a day, you can’t expect that someone will hand-tune their values for each asset. As such, most developers create buckets of quality settings, and compress their images according to that bucket.
For example, thumbnails may have a quality setting of 35, since the smaller image hides more of the compression artifacts. And maybe full-screen profile photos get a different setting that previews of Music album covers, etc etc.
And you can see this effect live and in the field: The imgmin project further goes to show that most large websites tend to oscillate their images around this quality=75 marks for almost all of their JPG images:
Google Images thumbnails:74-76
Facebook full-size images:85
Yahoo frontpage JPGs:69-91
YouTube frontpage JPGs:70-82
Wikipedia images:80
Windows live background:82
Twitter user JPEG images:30-100
The issue here is that the values chosen aren’t ideal.
They are usually the result of a single quality value chosen in a vacuum and then applied to all images coming through the system. In reality, some images could be compressed further with negligent quality loss, while other images will be compressed too much and not look good; The quality value should changes, per-images, in order to find the ideal sweet spot.
What if there was a way to measure the visual degradation that compression has on an image?
What if you could test that value against the quality metric to find out if it’s a good level?
What if you could automate the above two, to run on your server?
There is.
Can do.
Totally possible.
This all starts with something known as the Psychovisual Error Threshold, which basically denotes how much degradation can be inserted into an image before the human eye starts to notice it.
There’s a few measurements of this, notably the PSNR and SSIM metrics. Each has their own nuances with respect to evaluation measurement, which is why I rather prefer the new Butteraugli project. After testing it on a corpus of images, I found that the metric is a lot more understandable to me in terms of visual quality.
To do this, you write a simple script to:
- Save a JPG file at various quality values
- Use Butteraugli to test for the Psychovisual Error Threshold
- Stop once the output value is > 1.1
- And save the final image using that quality value
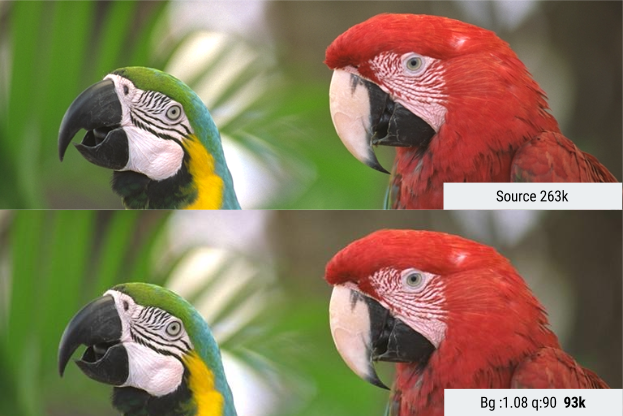
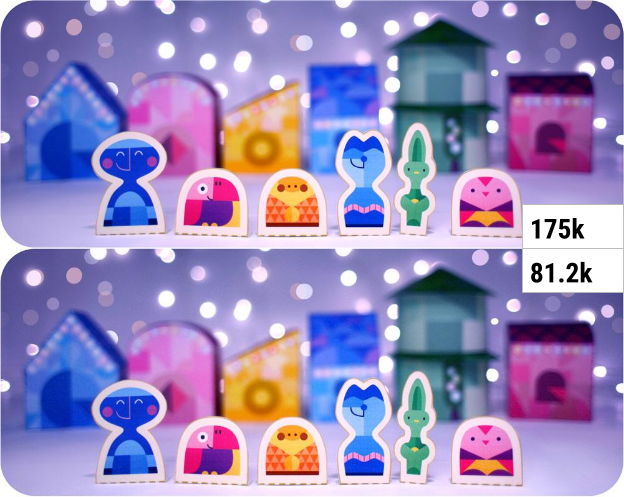
The result is the smallest JPG file possible that doesn’t impact the PET more than significantly noticeable. For the image below, the difference is 170k in saving, but visually it looks the same.
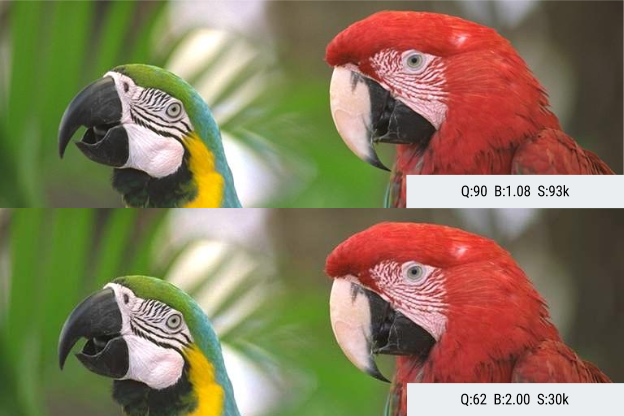
Of course, you could go even further than this. Maybe your goal is to allow a lot more visual loss in order to conserve bandwidth. You could easily continue on with this, but there’s madness there. As of right now, the Butteraugli denotes that any result > 1.1 is deemed “bad looking” and doesn’t try to define what any of that looks like, from a numerical authority. So you could run the script to stop once visual quality hits 2.0(see the image below) but at that point, it’s unclear what the visual scalar is that you’re testing against.
Blurring Chroma
One of the reasons that JPG is so powerful, is that expects there to be little visual variance in an 8*8 block. Directly, the human eye is more attuned to visual changes in the Luminosity channel of the YCbCr image. As such, if you can reduce the amount of variation in chroma across your 8*8 blocks, you’ll end up producing less visual artifacts, and better compression. The simplest way to do this is to apply a median filter to high-contrast areas of your chroma channel. Let’s take a look at this process with the sample image below.
One trick here is that most photo editing programs don’t support editing in YCbCr colorspace; but they do support LAB. The L channel represents Lightness(which is close to the Y channel, luminosity) while the A and B channels represent Red/Green and Blue/Yellow, similar components to Cb and Cr. By converting your image to LAB, you should see the following channels:

What we’d like to do is smooth out the sharp transitions in the A/B channels. Doing so will give the compressor more homogeneous values to work with. To do this, we select the areas of high detail in each of those channels, and apply a 1-3 pixel blur to that area. The result will smooth out the information significantly, without hurting the visual impact on the image much.
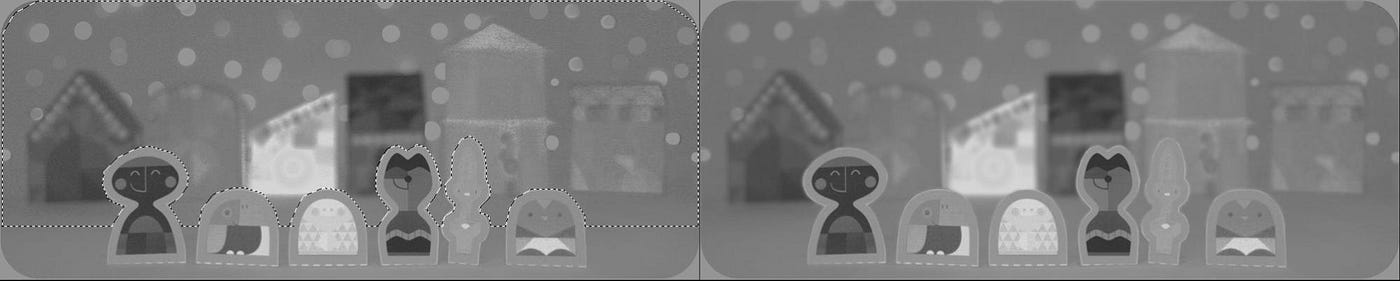
The main point here is that by slightly blurring the A/B modes of our image, we can reduce the amount of visual variance in those channels, such that when JPG goes through its’ down sampling phase, your image gets less unique information in the CbCr channels. You can see the result of that below.
The top image is our source file, and the bottom, we blurred some of the Cb/CR data in the image, producing a file that’s smaller by ~50%.
Use Guetzli
[update] Since writing this article originally, Google’s compression team has released Guetzli, which IMHO is one of the most impressive JPG codec’s I’ve seen in a while. It’s currently state-of-the-art, generating 20-30% smaller JPG images than libJPEG, which puts it on par w/WebP(see below) without having to support a unique format. I haven’t had a chance to dig into how the encoder works, just yet, but I’m eager to find some time to figure it out;)
Consider WebP
At this point, WebP shouldn’t be news to you. I’ve been suggesting folks use it for some time now, because it’s a really impressive codec. One of the original studies compared WebP to JPG, showing that the files can be 25%-33% smaller with the same SSIM index, which is a great amount of savings for just swapping file formats.
Regardless if you’re a web developer, or mobile developer, the support and saving from WebP denotes a firm evaluation for your pipeline.
“Science the shit out of it”
Thanks Mark, I sent you some potatoes; LMK when they arrive.
One of the biggest problems with modern image compression is that most engineering is done in the vacuum of “the file.” That is, pixel data comes in, compressed image format goes out.
Done.Move on.
But that’s really only half the story. Modern application consume images at various places and methods, for various needs. There is no single “one size fits all” solution, and certainly there’s opportunities to leverage the internet as a medium to transfer information.
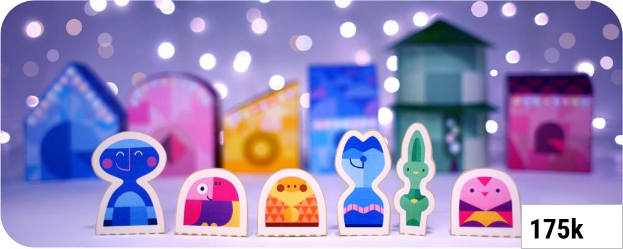
That’s why it’s so impressive that the engineers over @ Facebook figured out a hell of a way to leverage every type of trick they could to compress their images. The result has to be my favorite posts on the internet, reducing their preview photos to only 200 bytes each.
The magic behind this solution came from a lot of analysis of the JPG header data(which they were able to remove & hard-code in the codec) alongside an aggressive Blurring & scaling process that occurs @ load time. 200 bytes is insane. I haven’t seen anything that crazy since the Twitter Image Encoding challenge, which figured out you can evolve the Mona Lisa using genetic programming. Proof that thinking just in the space of an image codec may be limiting the ability to do truly amazing things with your data compression.
The takeaway
At the end of the day, your company needs to find a middle ground between automatic bucketing of quality values, against hand-optimizing them, and even figuring out how to compress data further. The result is going to be a reduction in cost for your send the content, store the content, and clients to receive the content.